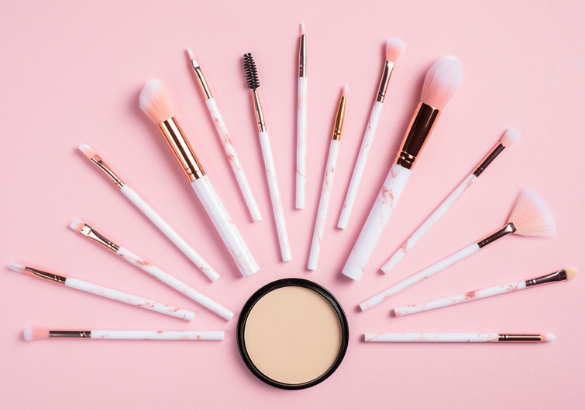
You can create your own set by assessing your needs and compiling a list of exactly what brushes you need and will use.
Smokey Eye Effect
To start you will need at least three colors of a similar shade
Apply eyelid primer. Eyelid primer creates a smooth base for your eyeshadow. Apply a thin layer onto your eyelids using your fingers before you start doing your eye makeup. This helps your makeup last longer and the colors you use will be more vibrant.
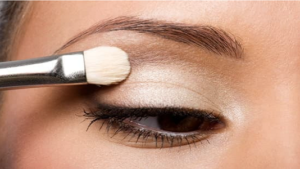
Place the lightest color on the insides of your eyes and under your brow. Use a small eyeshadow brush to pat the lightest color, also called the highlighter, onto the inside corners of your eyes. Then, sweep the highlighter directly under your eyebrow, above your crease, as well.
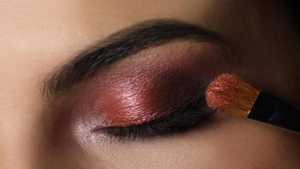
Blend your darkest color along your upper and lower lashline. Take your darkest eyeshadow and use your brush to sweep it along the entirety of your upper lash line. Swirl your brush up toward your crease to blend out the dark shade.
Add your middle tone along the center of your eyelid. Take your medium shade of eyeshadow, sometimes called a transition shade, and apply it starting about halfway up your eyelid. Sweep the middle color up toward your crease, and blend it down so it creates an ombre effect with the darker shade.
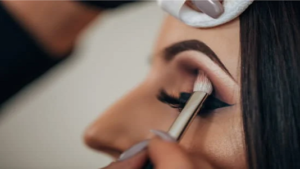
Blend your colors with a fluffy brush. Take a blending brush and sweep it in soft, broad strokes across your lid at the places where the different shades of eyeshadows meet. Keep sweeping and swirling the brush the colors are even and blended.
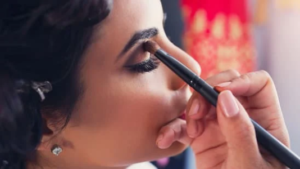
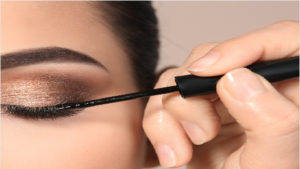
Add your eyeliner. For an ultra-dramatic smokey eye, it is best to use a smudged eyeliner look. Use a chunky eyeliner pencil to draw a thick line across your upper lash line only. Then, use your makeup brush or fingertip to blur the edges upwards.
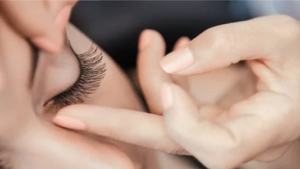
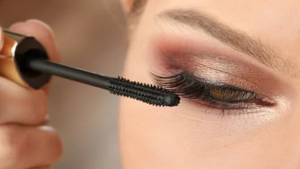
Add your mascara. Carefully apply your mascara to avoid getting any on your eyelid. Wiggle the brush between your lashes to help separate and define them. Avoid using more than two coats of mascara so that you don’t create unsightly clumps and lumps in your lashes. Apply it to your upper lashes first, and then a quick coat to your bottom lashes
Brush Options
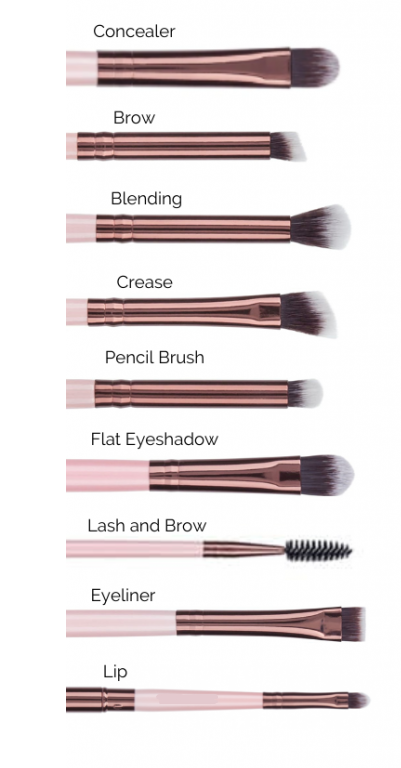
Brush Descriptions
Concealer
Great for concealer under the eyes, as well as cream eye shadow
Brow
Define and fill in brows, as well as for gel eyeliner application.
Blending
Great for applying and blending out eyeshadow in your crease
Crease
Angled brush for more precise placement in crease of eye.
Pencil Brush
If you like the smokey shadow eye, this brush helps to create that look.
Eyeshadow
Must have for eye makeup application. Creates smooth base.
Lash and Brow
Combs out lashes to even mascara and tames eyebrows.
Eyeliner
Great for applying gel eyeliner
Lip Brush
Creates a bold and smooth look to your lips
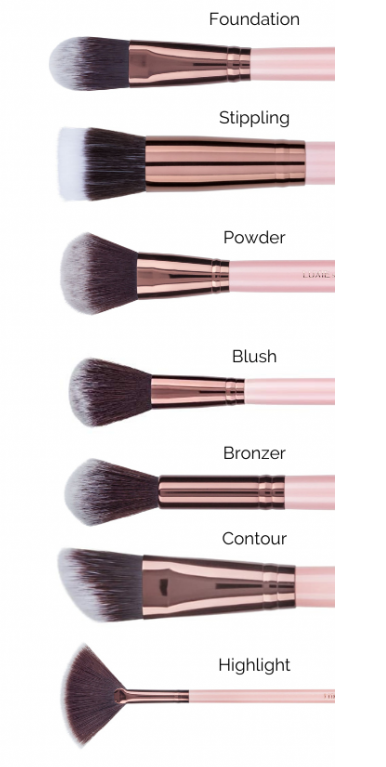
Foundation
Gives an even airbrush look.
Stippling
It can be used to apply foundation, blush, bronzer, powder, and highlighters. It also is very effective for applying liquid and cream products.
Powder
It can be used to set foundation, camouflage blemishes and redness, or even as an eyeshadow base
Blush
Similar to Powder brush, but covers smaller areas. Mainly coverage for your cheeks.
Bronzer
Adds warmth to the perimeter of the face instead of just the hollows of the cheeks
Contour
Used to define your cheekbones, forehead, jawline and nose which creates a sculpted look
Highlight
Helps to create a natural-looking glow to your cheekbones.